
If you’re a non-profit organization that’s looking to get off the ground even if you have a limited budget, Google has just the right program for you: Google NonProfit Ad Grant.
What is a Google Ad Grant for Google Nonprofit?
It is a monthly grant for text-based ads, which can value up to $10,000, completely for free. This means that your organization will rank higher in Google search results, which will help more people find your website.
Ads can be expensive, which is why a grant this big could be a breath of fresh air for your organization. Rather than spending your raised funds on advertising, you can use that budget for your organization’s other needs. When it comes to ads, if you are eligible, Google will grant you necessary financial support! You can use it to promote your website, so that you can gain supporters, volunteers and hopefully donations for your organization.
If you’re wondering how you can apply for the Google Nonprofit Ad Grant, keep reading!
There are 3 main steps on your way to getting a Google Ad Grant:
1. Make a Google Nonprofits Account:
If you have one, that’s perfect! You can skip to step two.
If you don’t have a Google Nonprofits account, you can make one very easily to get Google Ad Grants:
Head right to the Google for Nonprofits Sign Up page.
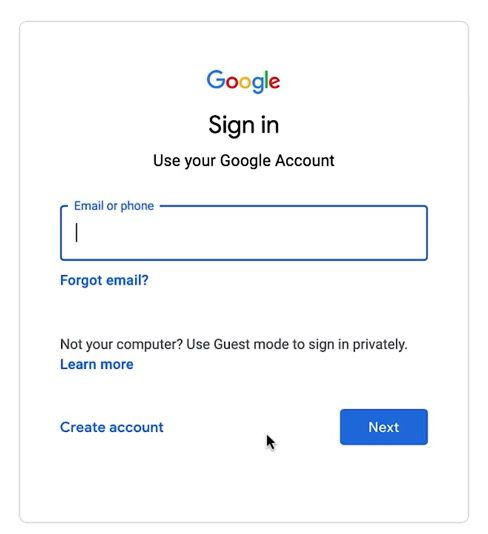
Sign in with the Google account you use for your organization and confirm using your password.
Answer the questions as you go by clicking next.
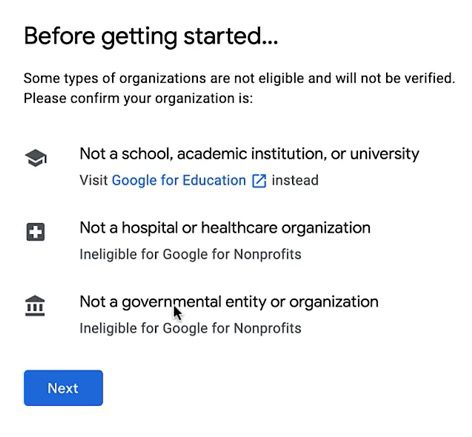
Unfortunately, if you’re a school, academic institution, university, hospital, healthcare organization, government entity or a government organization, you are not eligible for this grant.
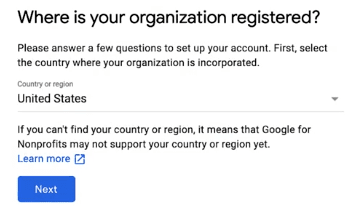
Choose the country where your organization is registered. Unfortunately, this program is not available in some countries. For further information, go to Google’s eligibility requirements.
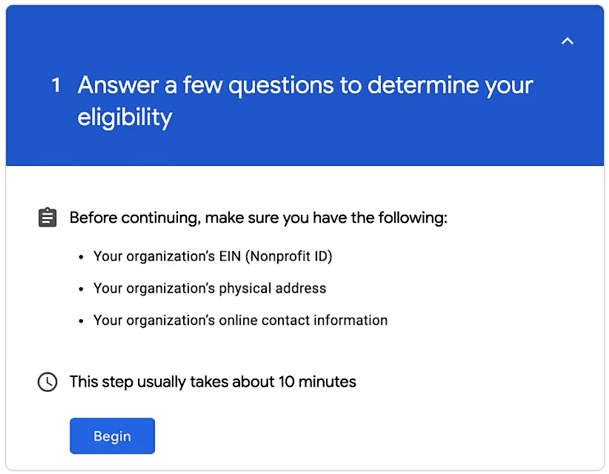
Answer the following questions. It will ask for your Nonprofit ID, your address and online contact information.
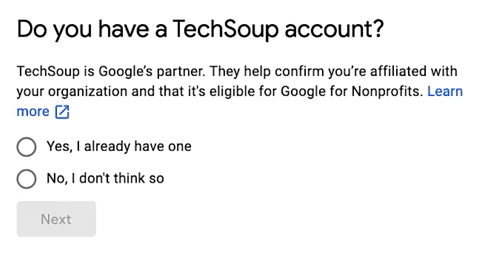
Google asks whether you have a TechSoup account, if you have one, log in through that account. If you don’t have one, don’t worry! You can continue without it or you can make one by looking at their guide at TechSoup.

If you don’t have a TechSoup account, you will need to answer a few more easy questions. Click next to continue.
Now, tell Google Nonprofits more about your organization:
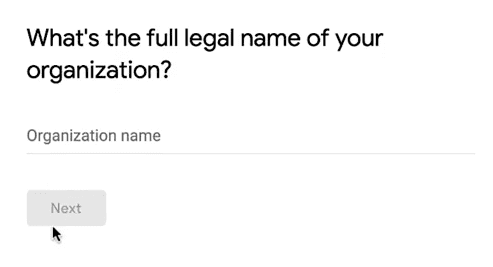
Write the full name of your Nonprofit organization.
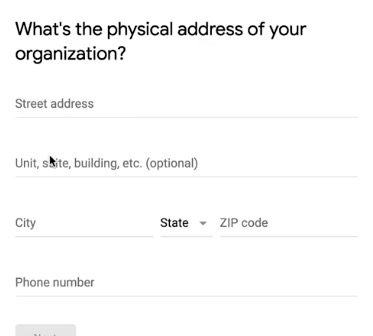
Write down the physical address of your organization.
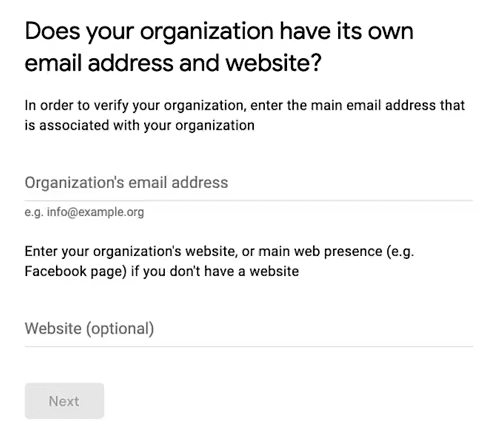
You need to have an email address and website to be eligible for Google Nonprofits. You can use the same email you use for your organization.
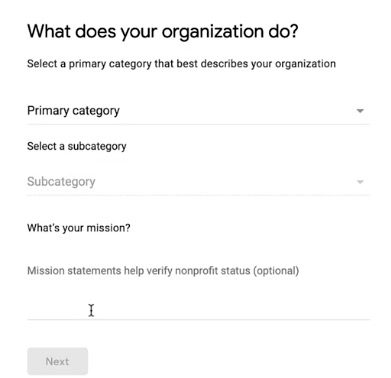
Choose the category that your organization falls under. You can also choose “Other” if none of them apply and then pick a subcategory below.
Write a quick statement about what you do. You can simply copy your mission statement from your website! It’s optional, but this helps you get verified quicker, so make sure not to leave it empty.
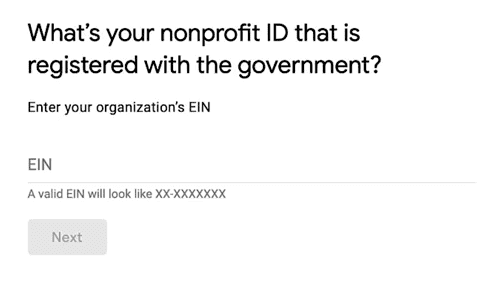
After that, you will need your nonprofit ID: this is your registration number given by the government. In the US, this is the same number as your EIN, which is an abbreviation for Employer Identification Number and if you have trouble finding it, check your IRS records, since you also use it for your taxes.

You’re almost there! Make sure to fill out your contact details, so that Google can know that you’re a representative from your organization.
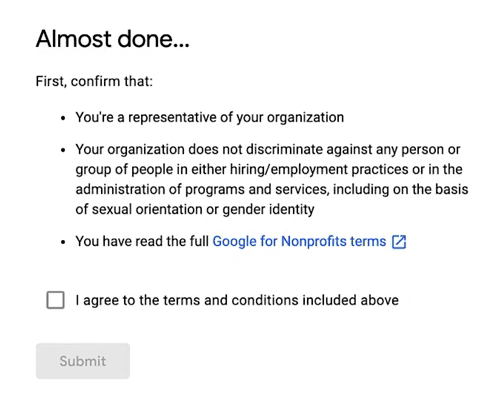
And finally, all you have to do is accept the terms and conditions by checking the box, then hit submit.
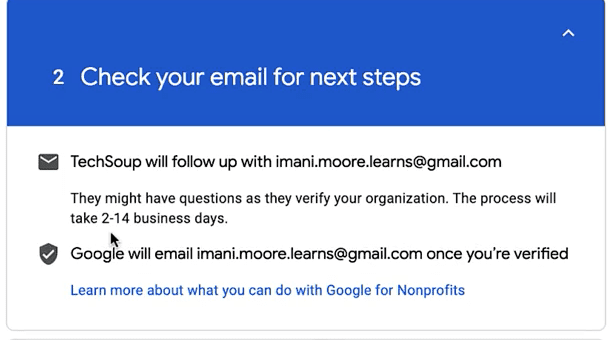
That’s it! Now all you have to do is wait.
Make sure to check your mail address regularly since they might reach out to you to ask more questions. This process might take a couple of weeks, and you will receive confirmation by Google when you’re accepted.
Once you receive the confirmation, it means you’re accepted: Congratulations!
2. Apply for the Google Nonprofit Ad Grant Program:
Firstly, make sure to go to your account homepage. If you’re not logged in, you can do so by signing into the account that you used for Google Nonprofits. This is the same account that you use for your organization, in addition, confirm it’s you by entering your password, and follow the instructions below.
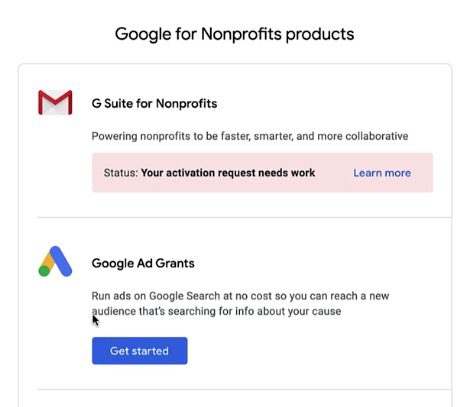
Subsequently, scroll down to “Google Ad Grants”, then hit “Get Started”.
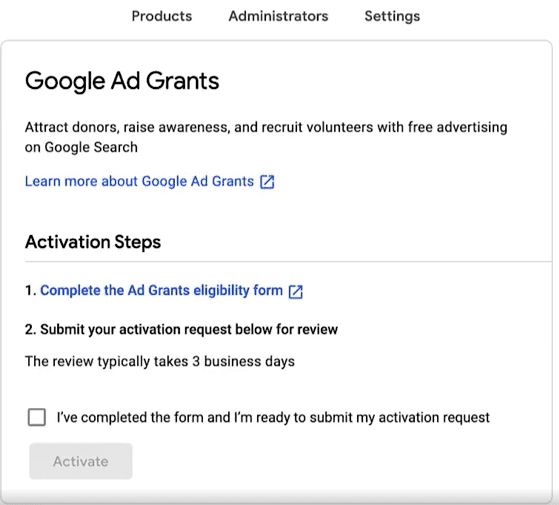
First step to apply for a grant is the eligibility form. Click on the first link to be redirected to the full form.
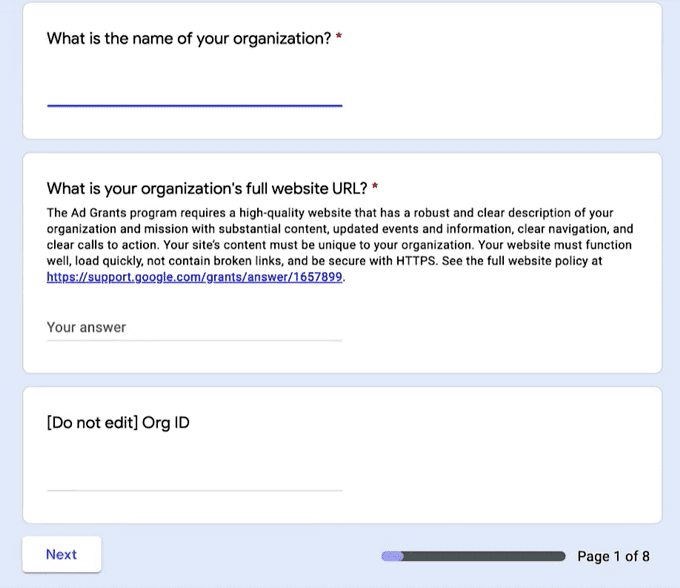
You will need to answer three simple questions at the beginning, similarly to how you applied for the Google Nonprofit program:
- Write down the full name of your nonprofit organization.
- Write down the full website URL. It’s important for your website to be up to par with google standards. You can find more information on this below.
- Write down your Organization ID; likewise as written above, this is the same as your EIN (Employer Identification Number) that you use for the IRS.
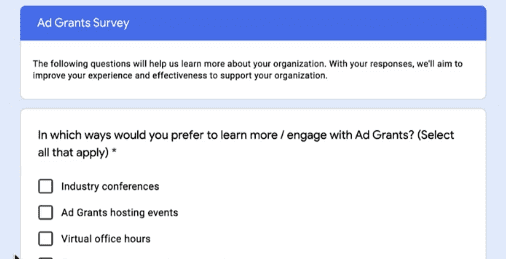
Next, you will need to answer a few pages of the survey, so that Google can support your organization better.
This might take a bit, but bear through it, the rest is much easier!
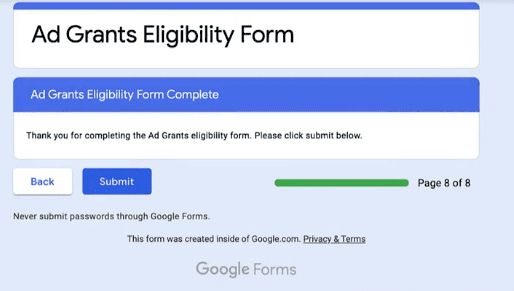
When you’re done, make sure to hit submit.

Once you’re done with the eligibility form, go back to your account homepage and hit Google Ad Grants.
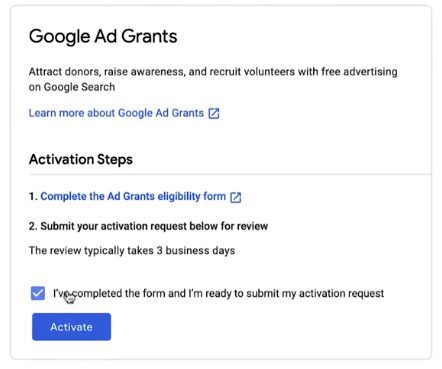
Now, all you have to do is check the box below and click Activate. Congrats! You have officially submitted your application. It will take a few days for Google to get back to you.
3. Accept the Invitations from Google Ads and Google Payments
If you get a confirmation email, that’s great! You’re almost there, you will have two emails in your inbox:
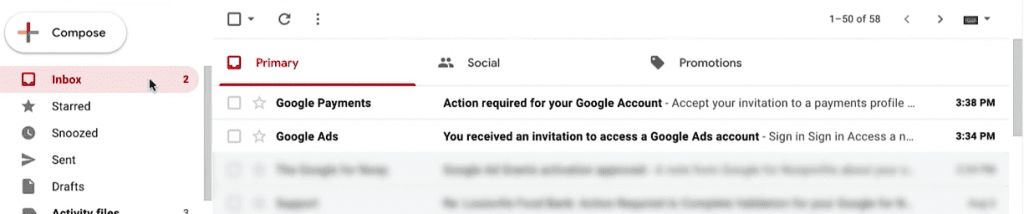
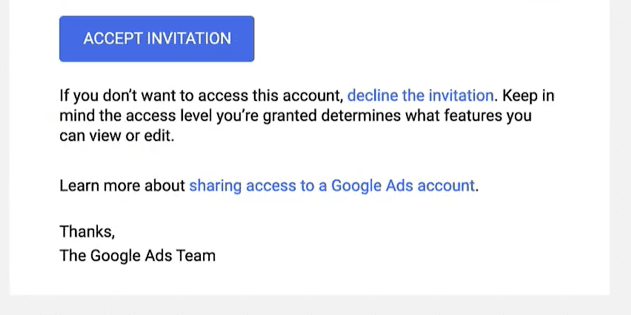
The email from “Google Ads” will include an “Accept Invitation” link, make sure to accept it. Consequently, this will lead you to your brand new Google Ads account.
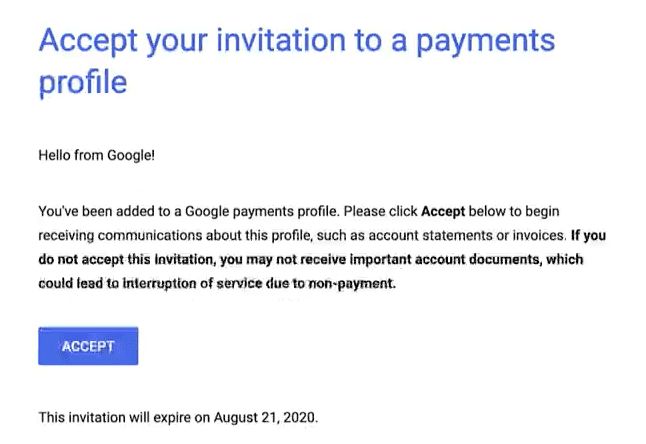
The email from “Google Payments” will invite you to your new payments profile. Don’t forget to accept it so that you can get your grant.
And it’s done! Congratulations, now you have wonderful new means to further support your organization, promote it and gain a lot of supporters! More supporters will drive more volunteers and donations.
This will surely drive more members, and as a non-profit organization, managing a lot of members can be a bit tricky. You will need to continuously engage with your donors, keep them up to date about what you’re doing and what you need help with, and connect donations online when needed.
All of this might seem intimidating, but it doesn’t need to be! We have just the solution for you:
Raklet is an all-in-one community management platform that can make your life a lot easier. We are here to assist you achieve your goals and help you change the world. Make sure to check out our Non-Profit Management Software and consider scheduling a demo to meet with one of our team members, so that we can help you better! You can start for free, and upgrade when needed.
Raklet wants to support people in the world who are doing good things. For qualified non-profit organizations and educational institutions, there is special pricing available.
We offer 50% discount on our Professional and Premium annual plans. For eligibility requirements please reach out to us at [email protected].
To read more about nonprofit organizations and how to reach your utmost potential, check out our pillar content where we have created an ultimate guide.
We also have other articles that might be of interest to nonprofit organizations!
- How To Manage Non-Profit Organizations In Pandemic
- Top 10 non-profit fundraising ideas to generate sustainable revenue
- The best CRM for non-profits for accelerating fundraising and better donor management
Extra: Is your website eligible to get approved by Google Nonprofit Ad Grant?
When applying for a Google Ad Grant, you will need to enter your Non-Profit Organization’s website. It’s a requirement that it must meet Google’s standards, as they will actively be promoting your organization. However, there is no need to be scared! There are only four main steps you should follow, and you can find them below:
1. Ownership
You must own the domain where you’re sending new visitors.
If you want to directly send visitors to a donation page owned by a third party, Google has verified the following platforms: Blackbaud Luminate, Classy, FrontStream Artez, Paypal, Kindful, Stripe and Shopify. You can find more on how to use each of them on this page.
2. Quality
Google asks for a simple few features to test your site’s quality. The simplest ones are to make sure your website loads quickly, that there aren’t any broken links, and if you’re using a new domain, make sure to have your domain secured by HTTPS rather than HTTP.
It’s also important for your site’s content to be unique to your organization. Make sure to have information about your organization on the website; such as what makes you different from other organizations, and what are your main goals. Google asks that the description of your nonprofit is visible, as well as the activities you’ve conducted and the events you’re hosting.
Your website must also be updated regularly and have a clear navigation so that users can easily access what they need.
3. Commercial Activity
Another important aspect that might go unsaid is that it must be clear on your website that it was not made for commercial gain. As your organization is a non-profit, Google expects it to reflect on your website.
Even if there are products and commercial services on your website, there must be further information as to how these services are helping your mission and how you’re using these funds. In such a case where you’re gathering funds from such activities, Google asks you to have an annual report visible. They value transparency.
Most importantly, it must be clear that you’re not only helping those who are paying for these services, but the general public in line with your organization’s mission.
4. Number of Ads
Following from point number three, all ads on your website must be related to your mission, and not drive away any potential supporters. Furthermore, Google does not allow you to use Google AdSense or any affiliates on your website, since they are for commercial purposes.


